Rengga Dev – Are you looking for some useful .htaccess tricks for your WordPress site. The .htaccess file is a powerful configuration file which allows you to do a lot of neat things on your website. In this article, we will show you some of the most useful .htaccess tricks for WordPress that you can try right away.
What is .htaccess File and How to Edit it?
The .htaccess file is a server configuration file. It allows you to define rules for your server to follow for your website.
WordPress uses .htaccess file to generate SEO friendly URL structure. However, this file can do a lot more.
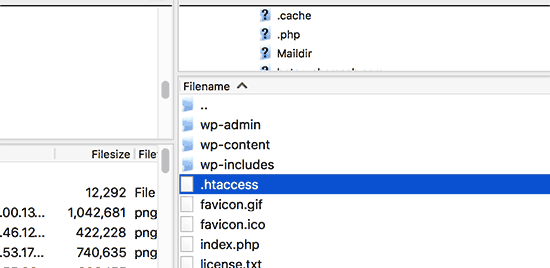
The .htaccess file is located in your WordPress site’s root folder. You will need to connect to your website using an FTP client to edit it.

If you cannot find your .htaccess file, then see our guide on how to find .htaccess file in WordPress.
Before editing your .htaccess file, it is important to download a copy of it to your computer as backup. You can use that file in case anything goes wrong.
Having said that, let’s take a look at some useful .htaccess tricks for WordPress that you can try.
1. Protect Your WordPress Admin Area
You can use .htaccess to protect your WordPress admin area by limiting the access to selected IP addresses only. Simply copy and paste this code into your .htaccess file:
AuthUserFile /dev/null
AuthGroupFile /dev/null
AuthName "WordPress Admin Access Control"
AuthType Basic
<LIMIT GET>
order deny,allow
deny from all
# whitelist Syed's IP address
allow from xx.xx.xx.xxx
# whitelist David's IP address
allow from xx.xx.xx.xxx
</LIMIT>
Don’t forget to replace xx values with your own IP address. If you use more than one IP address to access the internet, then make sure you add them as well.
2. Password Protect WordPress Admin Folder

If you access your WordPress site from multiple locations including public internet spots, then limiting access to specific IP addresses may not work for you.
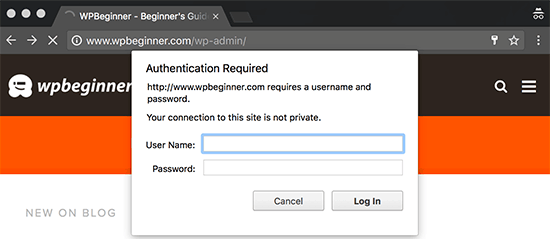
You can use .htaccess file to add an additional password protection to your WordPress admin area.
First, you need to generate a .htpasswds file. You can easily create one by using this online generator.
Upload this .htpasswds file outside your publicly accessible web directory or /public_html/ folder. A good path would be:
/home/user/.htpasswds/public_html/wp-admin/passwd/
Next, create a .htaccess file and upload it in /wp-admin/ directory and then add the following codes in there:
AuthName "Admins Only"
AuthUserFile /home/yourdirectory/.htpasswds/public_html/wp-admin/passwd
AuthGroupFile /dev/null
AuthType basic
require user putyourusernamehere
<Files admin-ajax.php>
Order allow,deny
Allow from all
Satisfy any
</Files>
For detailed instructions, see our guide on how to password protect WordPress admin folder.
3. Disable Directory Browsing

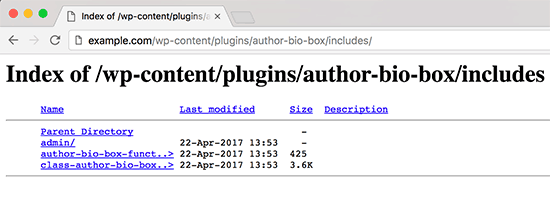
Many WordPress security experts recommend disabling directory browsing. With directory browsing enabled, hackers can look into your site’s directory and file structure to find a vulnerable file.
To disable directory browsing on your website, you need to add the following line to your .htaccess file.
Options -Indexes
4. Disable PHP Execution in Some WordPress Directories
Sometimes hackers break into a WordPress site and install a backdoor. These backdoor files are often disguised as core WordPress files and are placed in /wp-includes/ or /wp-content/uploads/ folders.
An easier way to improve your WordPress security is by disabling PHP execution for some WordPress directories.
You will need to create a blank .htaccess file on your computer and then paste the following code inside it.
<Files *.php>
deny from all
</Files>
5. Protect Your WordPress Configuration wp-config.php File
Probably the most important file in your WordPress website’s root directory is wp-config.php file. It contains information about your WordPress database and how to connect to it.
To protect your wp-config.php file from unathorized access, simply add this code to your .htaccess file:
<files wp-config.php>
order allow,deny
deny from all
</files>
6. Setting up 301 Redirects Through .htaccess File
Using 301 redirects is the most SEO friendly way to tell your users that a content has moved to a new location. If you want to properly manage your 301 redirects on posts per post basis, then check out our guide on how to setup redirects in WordPress.
On the other hand, if you want to quickly setup redirects, then all you need to do is paste this code in your .htaccess file.
Redirect 301 /oldurl/ http://www.example.com/newurl
Redirect 301 /category/television/ http://www.example.com/category/tv/
7. Ban Suspicious IP Addresses
Are you seeing unusually high requests to your website from a specific IP address? You can easily block those requests by blocking the IP address in your .htaccess file.
Add the following code to your .htaccess file:
<Limit GET POST>
order allow,deny
deny from xxx.xxx.xx.x
allow from all
</Limit>
8. Disable Image Hotlinking in WordPress Using .htaccess
Other websites directly hotlinking images from your site can make your WordPress site slow and exceed your bandwidth limit. This isn’t a big issue for most smaller websites. However, if you run a popular website or a website with lots of photos, then this could become a serious concern.
You can prevent image hotlinking by adding this code to your .htaccess file:
#disable hotlinking of images with forbidden or custom image option
RewriteEngine on
RewriteCond %{HTTP_REFERER} !^$
RewriteCond %{HTTP_REFERER} !^http(s)?://(www\.)?wpbeginner.com [NC]
RewriteCond %{HTTP_REFERER} !^http(s)?://(www\.)?google.com [NC]
RewriteRule \.(jpg|jpeg|png|gif)$ – [NC,F,L]
For more ways to protect your images see our guide on ways to prevent image theft in WordPress.
9. Protect .htaccess From Unauthorized Access
As you have seen that there are so many things that can be done using the .htaccess file. Due to the power and control it has on your web server, it is important to protect it from unauthorized access by hackers. Simply add following code to your .htaccess file:
<files ~ "^.*\.([Hh][Tt][Aa])">
order allow,deny
deny from all
satisfy all
</files>
10. Increase File Upload Size in WordPress
There are different ways to increase the file upload size limit in WordPress. However, for users on shared hosting some of these methods do not work.
One of the methods that has worked for many users is by adding following code to their .htaccess file:
php_value upload_max_filesize 64M
php_value post_max_size 64M
php_value max_execution_time 300
php_value max_input_time 300
11. Disable Access to XML-RPC File Using .htaccess
Each WordPress install comes with a file called xmlrpc.php. This file allows third-party apps to connect to your WordPress site. Most WordPress security experts advise that if you are not using any third party apps, then you should disable this feature.
There are multiple ways to do that, one of them is by adding the following code to your .htaccess file:
# Block WordPress xmlrpc.php requests
<Files xmlrpc.php>
order deny,allow
deny from all
</Files>
12. Blocking Author Scans in WordPress
A common technique used in brute force attacks is to run author scans on a WordPress site and then attempt to crack passwords for those usernames.
You can block such scans by adding the following code to your .htaccess file:
# BEGIN block author scans
RewriteEngine On
RewriteBase /
RewriteCond %{QUERY_STRING} (author=\d+) [NC]
RewriteRule .* - [F]
# END block author scans
We hope this article helped you learn the most useful .htaccess tricks for WordPress. You may also want to see our ultimate step by step WordPress security guide for beginners.


